
Your first beautifully decorated cake
A level cake, a light crumb coat, a smooth finish—and one lovely detail.
About 45–60 minutes decorating, plus baking, cooling, and chilling
Two fully cooled cake layers of the same size, prepared buttercream with its storage directions, a sturdy cake board, offset spatula, scraper, piping bag, and optional turntable.
Start cool and level
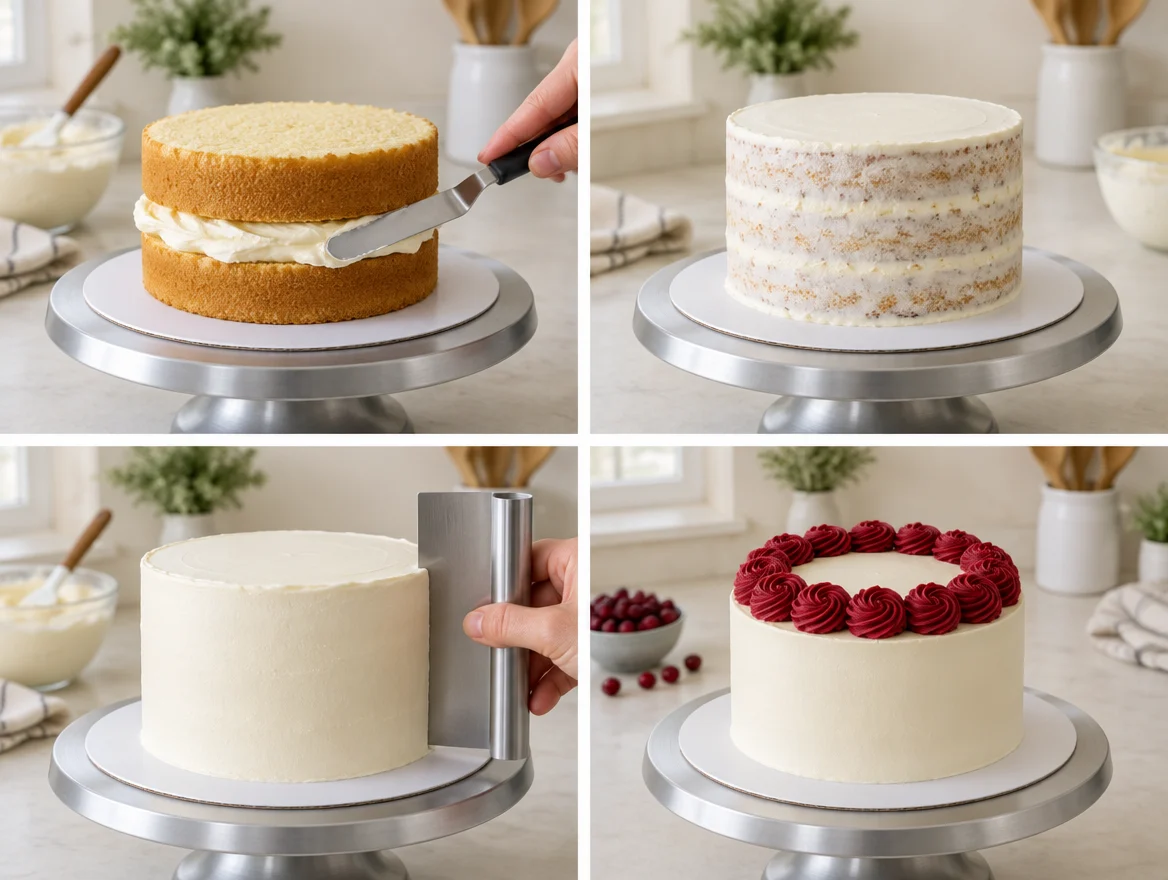
Bake the cake using its recipe and cool completely. A grown-up levels domed layers with a suitable knife if needed. Do not decorate warm cake: warmth can soften frosting and make layers slide.
Anchor and fill
Set the cake board on a stable surface. Use a dab of buttercream to anchor the first layer, then spread an even layer of filling. For your first cake, use a simple buttercream filling rather than a slippery or perishable one that needs special handling.
Apply a thin crumb coat
Spread a very light layer of buttercream over the top and sides to hold loose crumbs. It should still be possible to see the cake through parts of it. Keep crumb-laden frosting separate from your clean finishing batch.
Let the coat set, then cover
Allow the crumb coat to set as your frosting recipe directs; brief chilling can help with suitable buttercream. Add the final layer of frosting. Turn the cake slowly while holding the spatula or scraper steady. Stop before repeated smoothing starts undoing your work.
Add one confident detail
Try a simple border of stars, a ring of rosettes, or a textured spoon-swoosh top. Practice piping on parchment first. Do not add florist flowers, craft glitter, or unknown leaves; only decorations specifically suitable for food belong on the cake.
Store and transport thoughtfully
Follow the cake, filling, and frosting storage directions together—the most perishable component determines the plan. Keep refrigerated fillings cold, use a level cake carrier, and label allergens. Remove any non-edible decorations before serving.
Try one little thing.
Practice five stars on parchment, then pipe a small border on one cooled cupcake or practice cake.
Choose a printable for the adventure →